在使用 Flutter 开发应用的过程中我们经常遇到需要展示一组连续元素的情景。这时我们通常会选择使用 ListView 组件。在电商场景中,被展示的元素通常是一组商品、一组店铺又或是一组优惠券信息。把这些信息正确的展示出来仅仅是第一步,通常业务同学为了统计用户的浏览习惯、活动的展示效果还会让我们上报列表元素的曝光信息。
什么是曝光信息?
什么是曝光是信息呢?简单来说就是用户实际看到了一个列表中的哪些元素?实际展示给用户的这部分元素用户浏览了多少次?
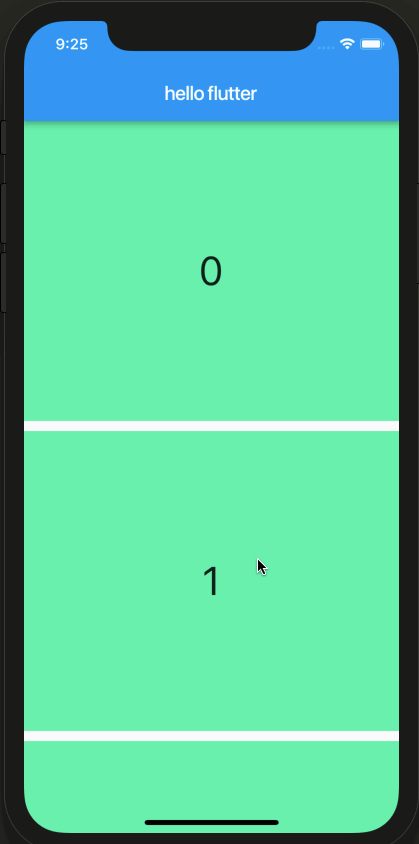
让我们通过一个简单示例应用来说明:
import 'package:flutter/material.dart';

class Card extends StatelessWidget {
  final String text;

  Card({
    @required this.text,
  });

  @override
  Widget build(BuildContext context) {
    return Container(
      margin: EdgeInsets.only(bottom: 10.0),
      color: Colors.greenAccent,
      height: 300.0,
      child: Center(
        child: Text(
          text,
          style: TextStyle(fontSize: 40.0),
        ),
      ),
    );
  }
}

class HelloFlutter extends StatelessWidget {
  final items = [0, 1, 2, 3, 4, 5, 6, 7, 8, 9, 10, 11, 12, 13, 14, 15];

  @override
  Widget build(BuildContext context) {
    return ListView.builder(
      itemCount: items.length,
      itemBuilder: (BuildContext context, int index) {
        return Card(text: '$index');
      },
    );
  }
}

void main() {
  runApp(MaterialApp(
      debugShowCheckedModeBanner: false,
      home: Scaffold(
          appBar: AppBar(title: Text('hello flutter')),
          body: HelloFlutter())));
}
上面这段代码创建了一个卡片列表。假设我们像下面这样操作:
应用启动时默认展示了第 0、1、2 张卡片,接着我们向下浏览到第 3 张卡片,这时第 0 张卡片已经离开屏幕可视区域。最后我们重新回到顶部,第 0 张卡片再次进入可视区域。
此时的曝光数据就是:
0 -> 1 -> 2 -> 3 -> 0在了解了什么是曝光信息以后,让我们来看看如何统计这类信息。在讲解具体方案之前,先让我们看看 ListView 组件的工作原理。
ListView 的基本工作原理
由于 ListView 组件的具体实现原理有很多细节,这里我们只从宏观上介绍和曝光逻辑相关的部分。
读过 ListView 组件文档的小伙伴应该都知道 ListView 组件的子元素都是按需加载的。换句话说,只有在可视区域的元素才会被初始化。这样做可以保证不论列表中有多少子元素,ListView 组件对系统资源的占用始终可以保持在一个比较低的水平。
按需加载的子元素是如何动态创建的呢?先让我们看看 ListView 的构造函数。
通常我们有 3 种方式创建一个 ListView (注:为方便阅读,三种创建方式中共同的参数已被省去):
ListView({
  List<Widget> children,
})

ListView.builder({
  int: itemCount,
  IndexedWidgetBuilder itemBuilder,
})

ListView.custom({
  SliverChildDelegate childrenDelegate,
})
大家可能对前两种比较熟悉,分别是传入一个子元素列表或是传入一个根据索引创建子元素的函数。其实前两种方式都是第三种方式的“快捷方式”。因为 ListView 内部是靠这个 childrenDelegate 属性动态初始化子元素的。
以 ListView({List<Widget> children}) 为例,其构造函数如下:
  ListView({
    ...
    List<Widget> children: const <Widget>[],
  }) : childrenDelegate = new SliverChildListDelegate(
         children,
         addAutomaticKeepAlives: addAutomaticKeepAlives,
         addRepaintBoundaries: addRepaintBoundaries,
       ), super(
    key: key,
    ...
  );
可见,这里自动帮我们创建了一个 SliverChildListDelegate 的实例。而SliverChildListDelegate 是抽象类 SliverChildDelegate 的子类。SliverChildListDelegate 中主要逻辑就是实现了 SliverChildDelegate 中定义的 build 方法:
  @override
  Widget build(BuildContext context, int index) {
    assert(children != null);
    if (index < 0 || index >= children.length)
      return null;
    Widget child = children[index];
    assert(child != null);
    if (addRepaintBoundaries)
      child = new RepaintBoundary.wrap(child, index);
    if (addAutomaticKeepAlives)
      child = new AutomaticKeepAlive(child: child);
    return child;
  }
逻辑很简单,根据传入的索引返回 children 列表中对应的元素。
每当 ListView 的底层实现需要加载一个元素时,就会把该元素的索引传递给 SliverChildDelegate 的 build 方法,由该方法返回具体的元素。当通过 ListView.builder 方式创建 ListView 时,构造函数自动帮我们创建的是 SliverChildBuilderDelegate 实例(点此查看相关代码)。
看到这里你可能会问,说了这么多,和曝光统计有什么关系呢?
在 SliverChildDelegate 内部,除了定义了 build 方法外,还定义了一个名为 didFinishLayout 的方法:
void didFinishLayout(int firstIndex, int lastIndex) {}每当 ListView 完成一次 layout 之后都会调用该方法。同时传入两个索引值。这两个值分别是此次 layout 中第一个元素和最后一个元素在 ListView 所有子元素中的索引值。也就是可视区域内的元素在子元素列表中的位置。我们只要比较两次 layout 之间这些索引值的差异就可以推断出有哪些元素曝光了,哪些元素隐藏了。
然而不论是 SliverChildListDelegate 还是 SliverChildBuilderDelegate 的代码中,都没有 didFinishLayout 的具体实现。所以我们需要编写一个它们的子类。
具体实现
首先让我们定义一个实现了 didFinishLayout 方法的 SliverChildBuilderDelegate 的子类:
class MySliverChildBuilderDelegate extends SliverChildBuilderDelegate {
  MySliverChildBuilderDelegate(
    Widget Function(BuildContext, int) builder, {
    int childCount,
    bool addAutomaticKeepAlives = true,
    bool addRepaintBoundaries = true,
  }) : super(builder,
            childCount: childCount,
            addAutomaticKeepAlives: addAutomaticKeepAlives,
            addRepaintBoundaries: addRepaintBoundaries);

  @override
  void didFinishLayout(int firstIndex, int lastIndex) {
    print('firstIndex: $firstIndex, lastIndex: $lastIndex');
  }
}
然后将我们示例应用中创建 ListView 的代码改为使用我们新创建的类:
  Widget build(BuildContext context) {
    return ListView.custom(
      childrenDelegate: MySliverChildBuilderDelegate(
        (BuildContext context, int index) {
          return Card(text: '$index');
        }, childCount: items.length,
      ),
    );
  }
重新在模拟器中启动我们的实例程序可以看到:
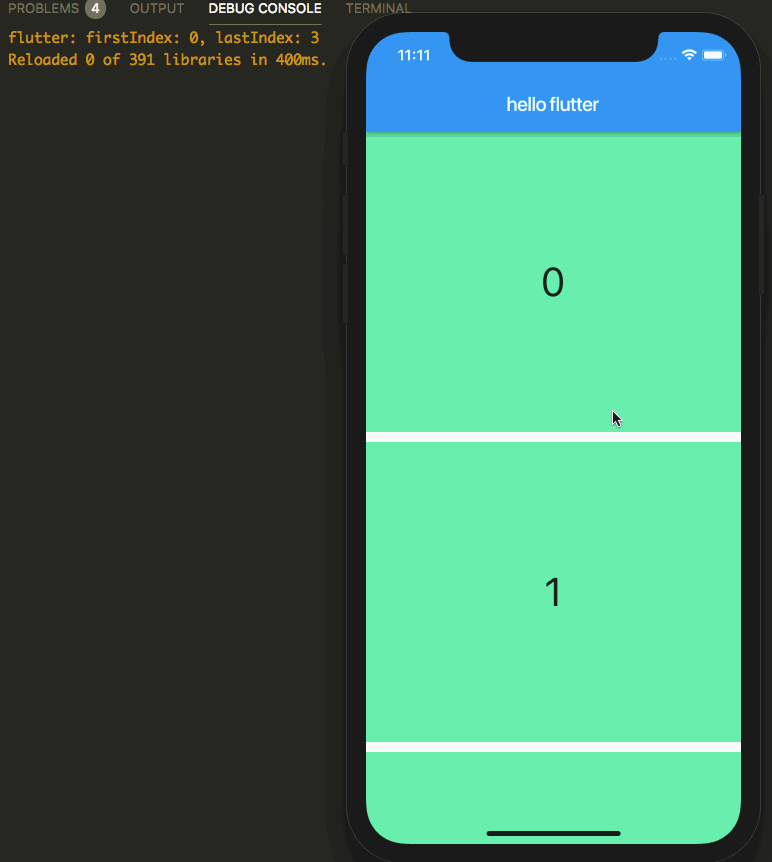
首先我们可以看到调试终端中输出了我们打印的调试信息。但是仔细观察会发现输出的信息和我们期望的并不完全一致。首先我们打开首屏时,可是区域内只展示了 3 张卡片,但终端中输出的 lastIndex 却是 3,这意味着 ListVivew 组件实际渲染了 4 张卡片。其次,随着我们划动屏幕将第 1 张卡片划出可视区域后,firstIndex 并没有立即从 0 变成 1,而是在我们继续划动一段距离后才改变。
经过查阅文档并阅读相关源码,我们了解到 ListView 中还有一个 cacheExtent 的概念。可以简单理解成一个“预加载”的区域。也就是说出现在可视区域上下各 cacheExtent 大小区域内的元素会被提前加载。虽然我们创建 ListView 时并没有指定该值,但由于该属性有一个默认值,所以还是影响我们的曝光统计。
现在让我们更新示例应用的代码,明确把 cacheExtent 设置为 0.0:
    return ListView.custom(
      childrenDelegate: MySliverChildBuilderDelegate(
        (BuildContext context, int index) {
          return Card(text: '$index');
        }, childCount: items.length,
      ),
      cacheExtent: 0.0,
    );
重启示例应用:
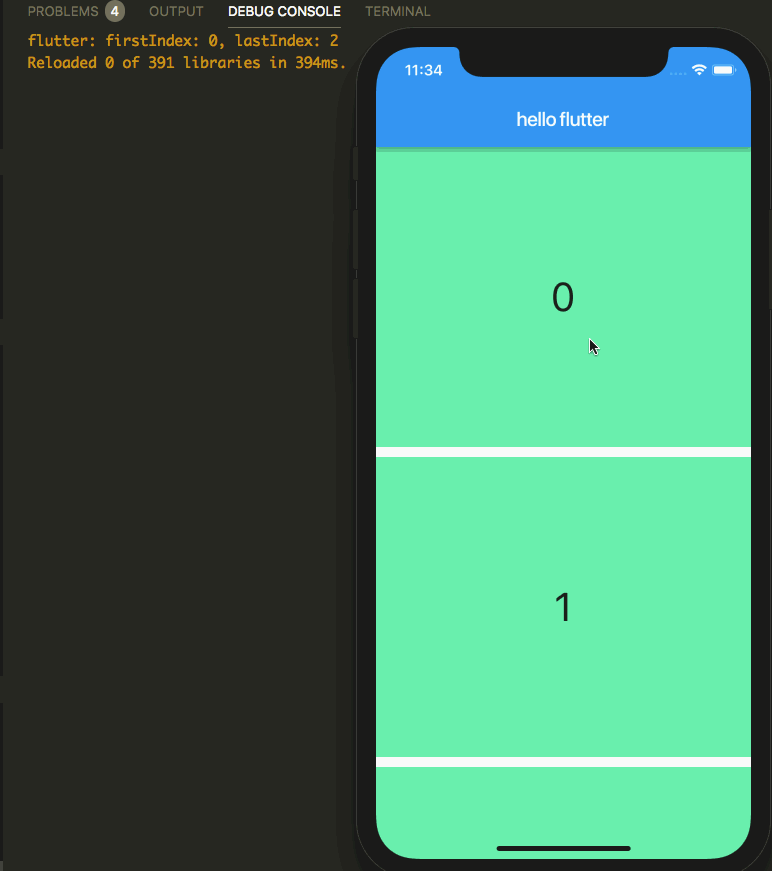
可以看到这次我们已经可以正确获取当前渲染元素的索引值了。
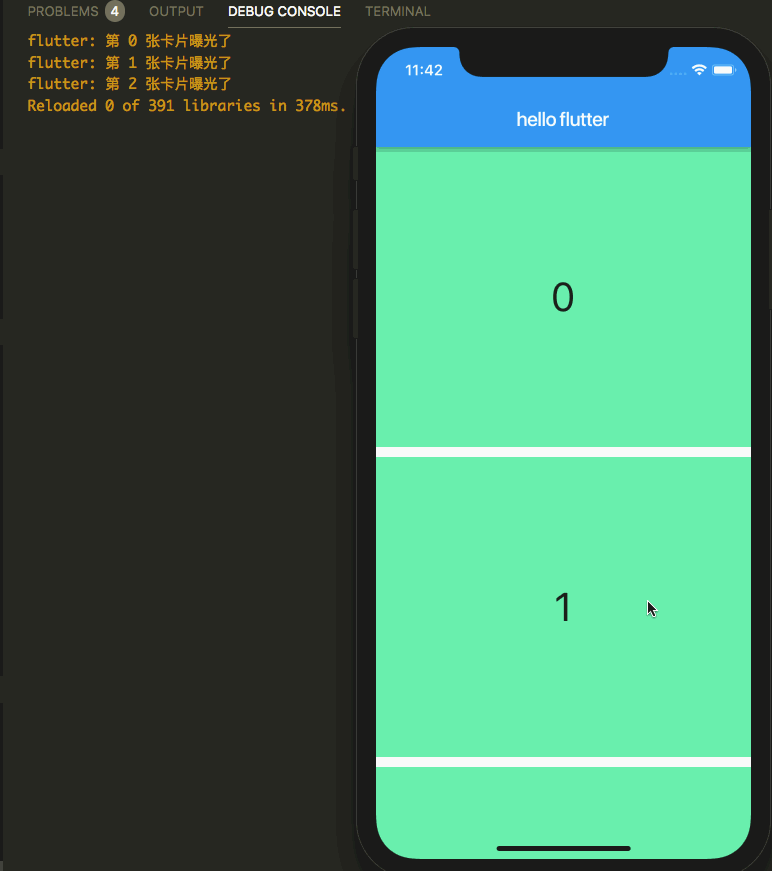
剩下的逻辑就很简单了,我们只需要在 MySliverChildBuilderDelegate 中记录并比较每次 didFinishLayout 收到的参数就可以正确的获取曝光元素的索引了。具体的代码就不贴在这里了,文末会给出实例应用的代码库地址。
让我们看看完成后的效果吧:
总结
由于强制把 cacheExtent 强制设置为了 0.0,从而关闭了“预加载”。在复杂页面中快速划动时有可能会有延迟加载的情况,这需要大家根据自己具体的场景评估。本文中介绍的方案也不是实现曝光统计逻辑的唯一方式,只是为大家提供一个思路。欢迎一起讨论 :)。
本文中示例应用的完整代码可以在这里找到。